![]()
Hive Splitting
It's good practice to split a hive in spring to prevent swarming + disrupt the varroa mites breeding cycle. Here is a great way to split a hive and get the bees to readily accept and naturally breed their own queen.
Information source: Peter Smith from Franklin Beekeepers Club.
What you need |
|
When to do it |
|
During spring and summer when the sources of nectar and pollen are abundant. |
What to do |
Note: Be careful to ensure you don’t trap the original Queen in the new box. |
|
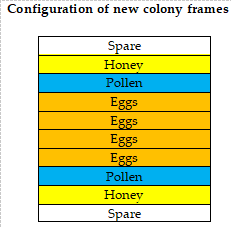
The frames in the new colony should consist of:
|
|
You should concentrate on getting eggs that are less than 3 days old, these will make the best Queens. Have the honey and pollen on the outside of the eggs, the eggs should be in the centre of the frames.
|
|
You should concentrate on getting eggs that are less than 3 days old, these will make the best Queens. Have the honey and pollen on the outside of the eggs, the eggs should be in the centre of the frames.
2.Add empty frames into the parent hive to replace the frames you have removed in a similar configuration as the new box. 3.The queen excluder is now put onto the parent hive, with the box of beeless frames on top of this. Leave this configuration for 24 hours. |
|
|
|
After 24 hours
2. Take the new box above the excluder and move it sideways. You should see plenty of nurse bees looking after the brood in the top box. |
|
4. Move the old boxes to the side at least 3 or 4 feet away. |
|
|
|
5 weeks later Check that new box has a new laying Queen. If you open the hive earlier than 5 weeks you endanger the whole operation. |
 1.This empty box now full of beeless frames becomes the queen rearing unit.
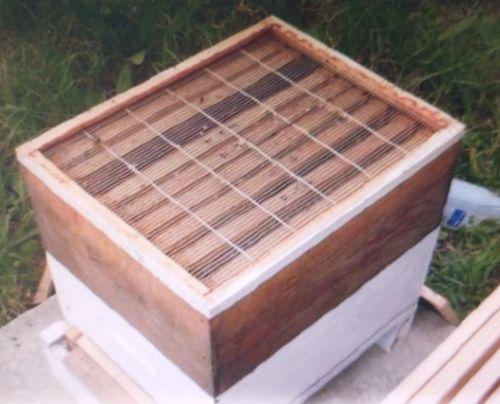 Queen excluder on the top of old hive
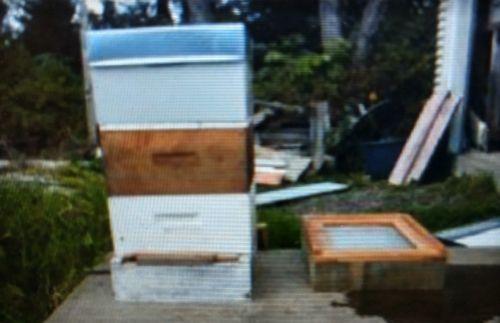 1. The top box will now be full of young nurse bees looking after the frames of brood with the original queen below the excluder.
 3. Place the new box in the location of the old hive, with a new bottom board and roof. This adds some flying bees to the new colony.
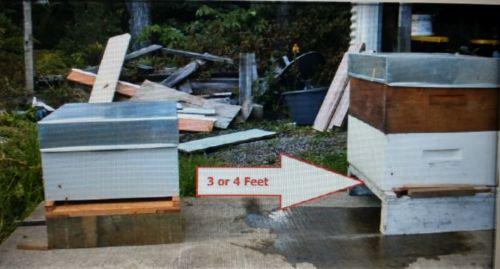 5. You may need to put an extra box onto the split and it’s a good idea to put a box onto parent hive to house the expanding hive.